User Story Mapping – An Important Tool in the Product Owner Toolbox
What is User Story Mapping?
User Story Mapping is a way to align your team with a goal and at the same time create a better user understanding. For me, it has become a very important tool in my product owner toolbox. Before I move from the discovery phase to the production phase with a topic, I conduct a user story mapping workshop with my Scrum team. I’ll show you how to do a User Story Mapping Workshop later. For now, I’ll explain how the User Story Mapping technique works.
Basically, a user story map is an arrangement of user stories sorted from left to right on a horizontal axis. The stories are sorted according to the chronological progression of user actions with which our user wants to achieve a certain success. A user action that is performed earlier in a process than another action is located further to the left on our axis. On the vertical axis, we map the user stories that pay off on a particular user action.
How does story mapping work?
For User Story Mapping you need about 3 Stunden.
With this step-by-step guide, you can apply user story mapping to your project.
- Step: Note all user actions
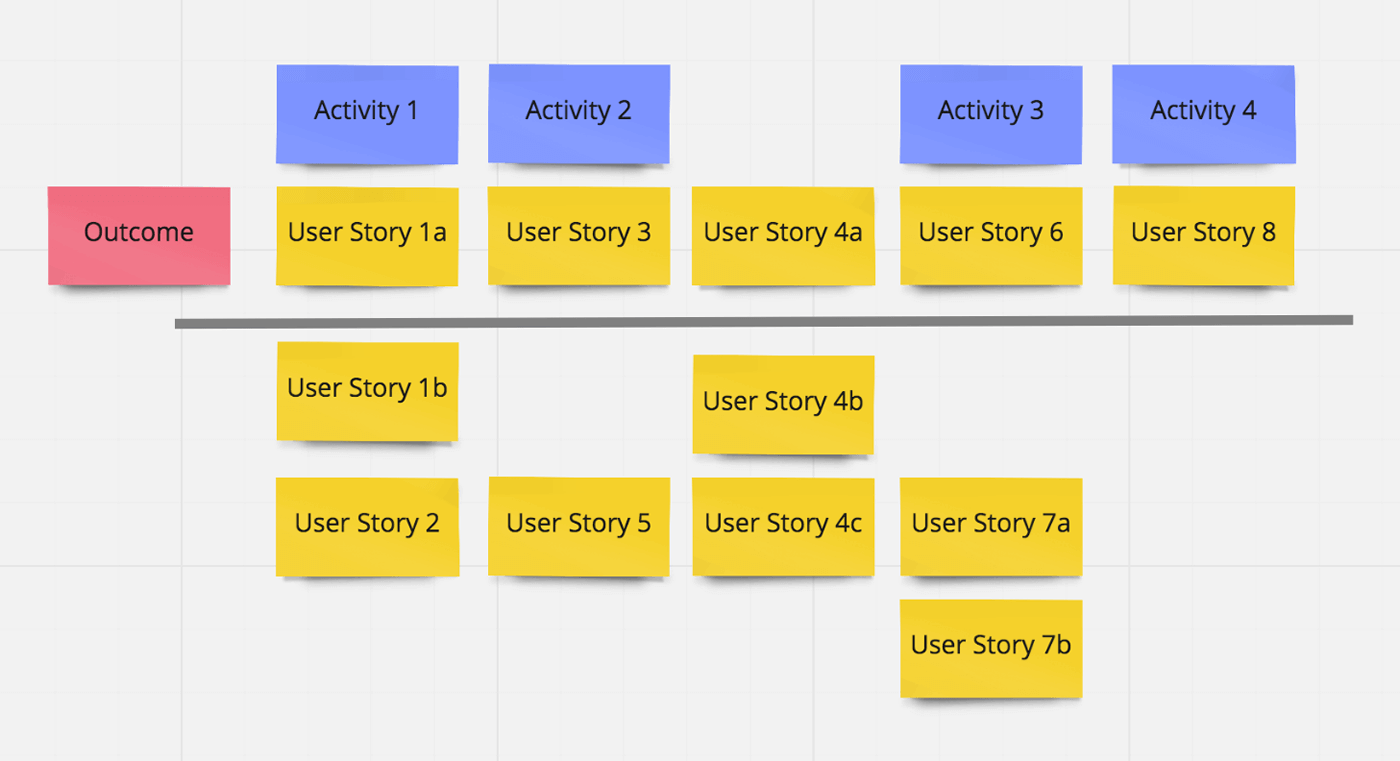
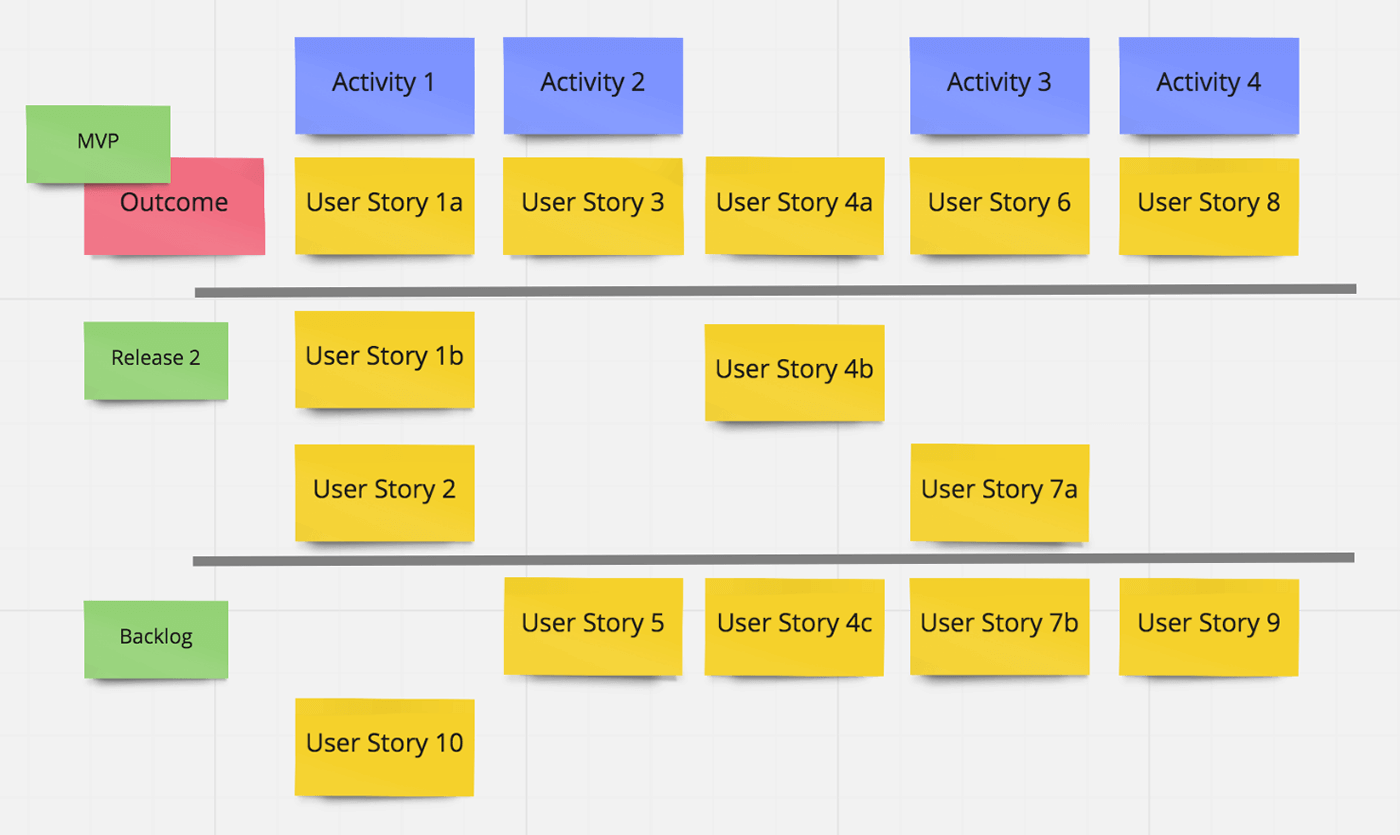
In the screenshot you can already see different cards with different user stories, which have already been listed according to a chronological order.


- Step: Cluster user interactions and create basic framework
The basic structure of your story map is also called backbone in story mapping. This means that you cluster all activities with an activity map. For example, if a user has to go through different steps in a sales funnel on a website, each step on the website can be an activity. In my illustration, I marked the main activities with blue sticky notes. Under Activity 1 are the User Stories 1 and 2. Under Activity 2 are the User Stories 3,4 and 5.

- Step: Define goal and create MVP
Next, create a note with the outcome you want the user to achieve with your product. The outcome is placed on the far left at the top of the User Story bar. Next, draw a line under the user story bar. In my illustration, I created a gray line. All user stories that are important for a Minimal Viable Product, or MVP, that can be used to achieve the Outcome stay above the line. All stories that are not necessarily important for your MVP are put below the line. Personally, I already do a rough effort estimate here with my team. Most of the time, I pursue the goal that an MVP can be created within one sprint. If I find that the effort exceeds one sprint, I discuss with my team to generate alternative solutions. Stories can be shared, for example, to reduce the effort of a story. Stories that are not relevant to the MVP end up below the line. When you split stories, you need to make sure that the user outcome can still be achieved. In the figure below, you can see that Stories 1, 4, and 7 have been split. Only User Story 1a is included in the MVP. User Story 1b is not mandatory and is placed below the line.
- Step: Planning of further releases
Next, draw another line under your stories. You can already start thinking with your team about how the product should be further developed after go-live. I have divided the other areas of the user story map vertically into “Release 2” and “Backlog”. If you have a larger project, you can also plan for more releases. Since I already estimate the approximate effort with my team in the Story Mapping Workshop, I can plan the upcoming releases together with the team.
User Story Mapping Workshop
For every project start or new product, I now do a user story mapping workshop with my team. It is important that your entire team takes part in the workshop and knows all the background to the decisions made in the workshop. Depending on the topic, I already have mockups or wireframes with me, which I hang up in the sequence defined for the user. The visual elements make it easier for all participants to get a common understanding of the topic. The screens often already provide a first list of activities. I sometimes prepare the activities and also hang them on a whiteboard in the potential sequence. This saves you some time and the workshop runs more efficiently. Depending on the topic, a User Story Mapping workshop lasts between 3 and 6 hours with breaks. However, the duration depends a lot on how many participants take part and how many discussions take place between the participants. However, user stories should not be fully elaborated in the story mapping workshop. This happens later in the Backlog Refinement. The stories are created in the workshop together with the team and supplemented with bullet points or ideas.
My favorite open source story mapping tool
The easiest way, of course, is to use the story mapping technique with sticky notes in an on-site workshop.
Since a lot of people now work from home or generally already in a distributed team, it is difficult to conduct a workshop on site. Then, of course, the only option is a remote workshop.
For a remote workshop, I like to use miro.com. At Miro, you can use a pre-built user story mapping template to run your workshop. Each participant can create a Miro account for free and see and edit the story map. Once a change is made on the map, it is visible to everyone without delay. I also created the illustrations in this text using Miro.
My conclusion on User Story Mapping
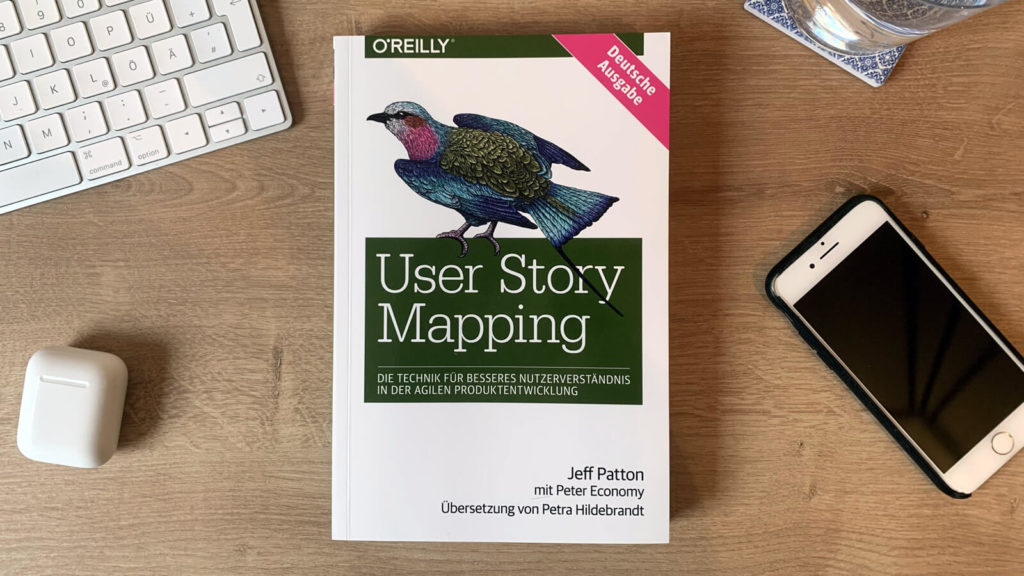
My conclusion on user story mappingI regularly use the technique at the beginning of a project so that I can create a uniform understanding of user needs with my team. Anyone who knows the story map can immediately figure out how a project is set up and what the goals are with the different releases. For me, the story map is a living artifact and can always be developed further from release to release. If you want to know more about this topic, I can recommend the book “User Story Mapping” by Jeff Patton. He invented the tool and wrote a very good book about it that I think every product owner should know. There are also some exciting lectures by Jeff Patton on Youtube. I have included a lecture that I think is really good here: